How to Set Up Purchase Based Member Tiers Program

Member Tiers enables you to classify customers into different tiers based on their purchasing behavior, effectively acknowledging and incentivizing their spending. By rewarding higher spending or more frequent purchases with exclusive benefits, you can encourage repeat business and deepen customer relationships, which is crucial in the competitive ecommerce landscape.
Purchase-based member tiers is an alternative to the traditional points-based systems. Instead of earning points, customers' tier statuses are determined by their purchase history or the amount of money they have spent. This approach is narrower, focusing specifically on purchase activities for tier qualification. It's a popular model in eCommerce, enhancing customer loyalty by recognizing and rewarding spending behavior.
Key highlights include:
- Tier statuses are based on total dollars spent within a specified period (e.g., a calendar year, the last 365 days, or lifetime).
- Option to set a delay for tier rewards to prevent fraud.
- Integration with ecommerce platforms like Shopify for purchase validation.
- Analytics enhancements for tracking and managing customer tiers.
- Loyalty dashboard widget enhancements for better visualization and tracking of tier statuses.
Getting Started with Purchase Based Member Tiers
Adding Member Tiers to your Loyalty Program can be an excellent way to incentivize and retain your customers. This guide will help you understand how to set up Purchase-Based Member Tiers for your Loyalty Program using the Friendbuy platform.
Before You Begin
In order to use the Member Tiers feature, certain settings need to be enabled in your Friendbuy account. Please contact our support team (support@friendbuy.com) or your Customer Success Manager who can enable these settings for you.
Configuring Member Tiers
Friendbuy provides the flexibility to configure the Member Tiers. You can choose how members move up and down each tier as shown below:
- Access the Member Tiers Page: In the Friendbuy platform, go to the "Loyalty" section, then click on "Member Tiers" tab.
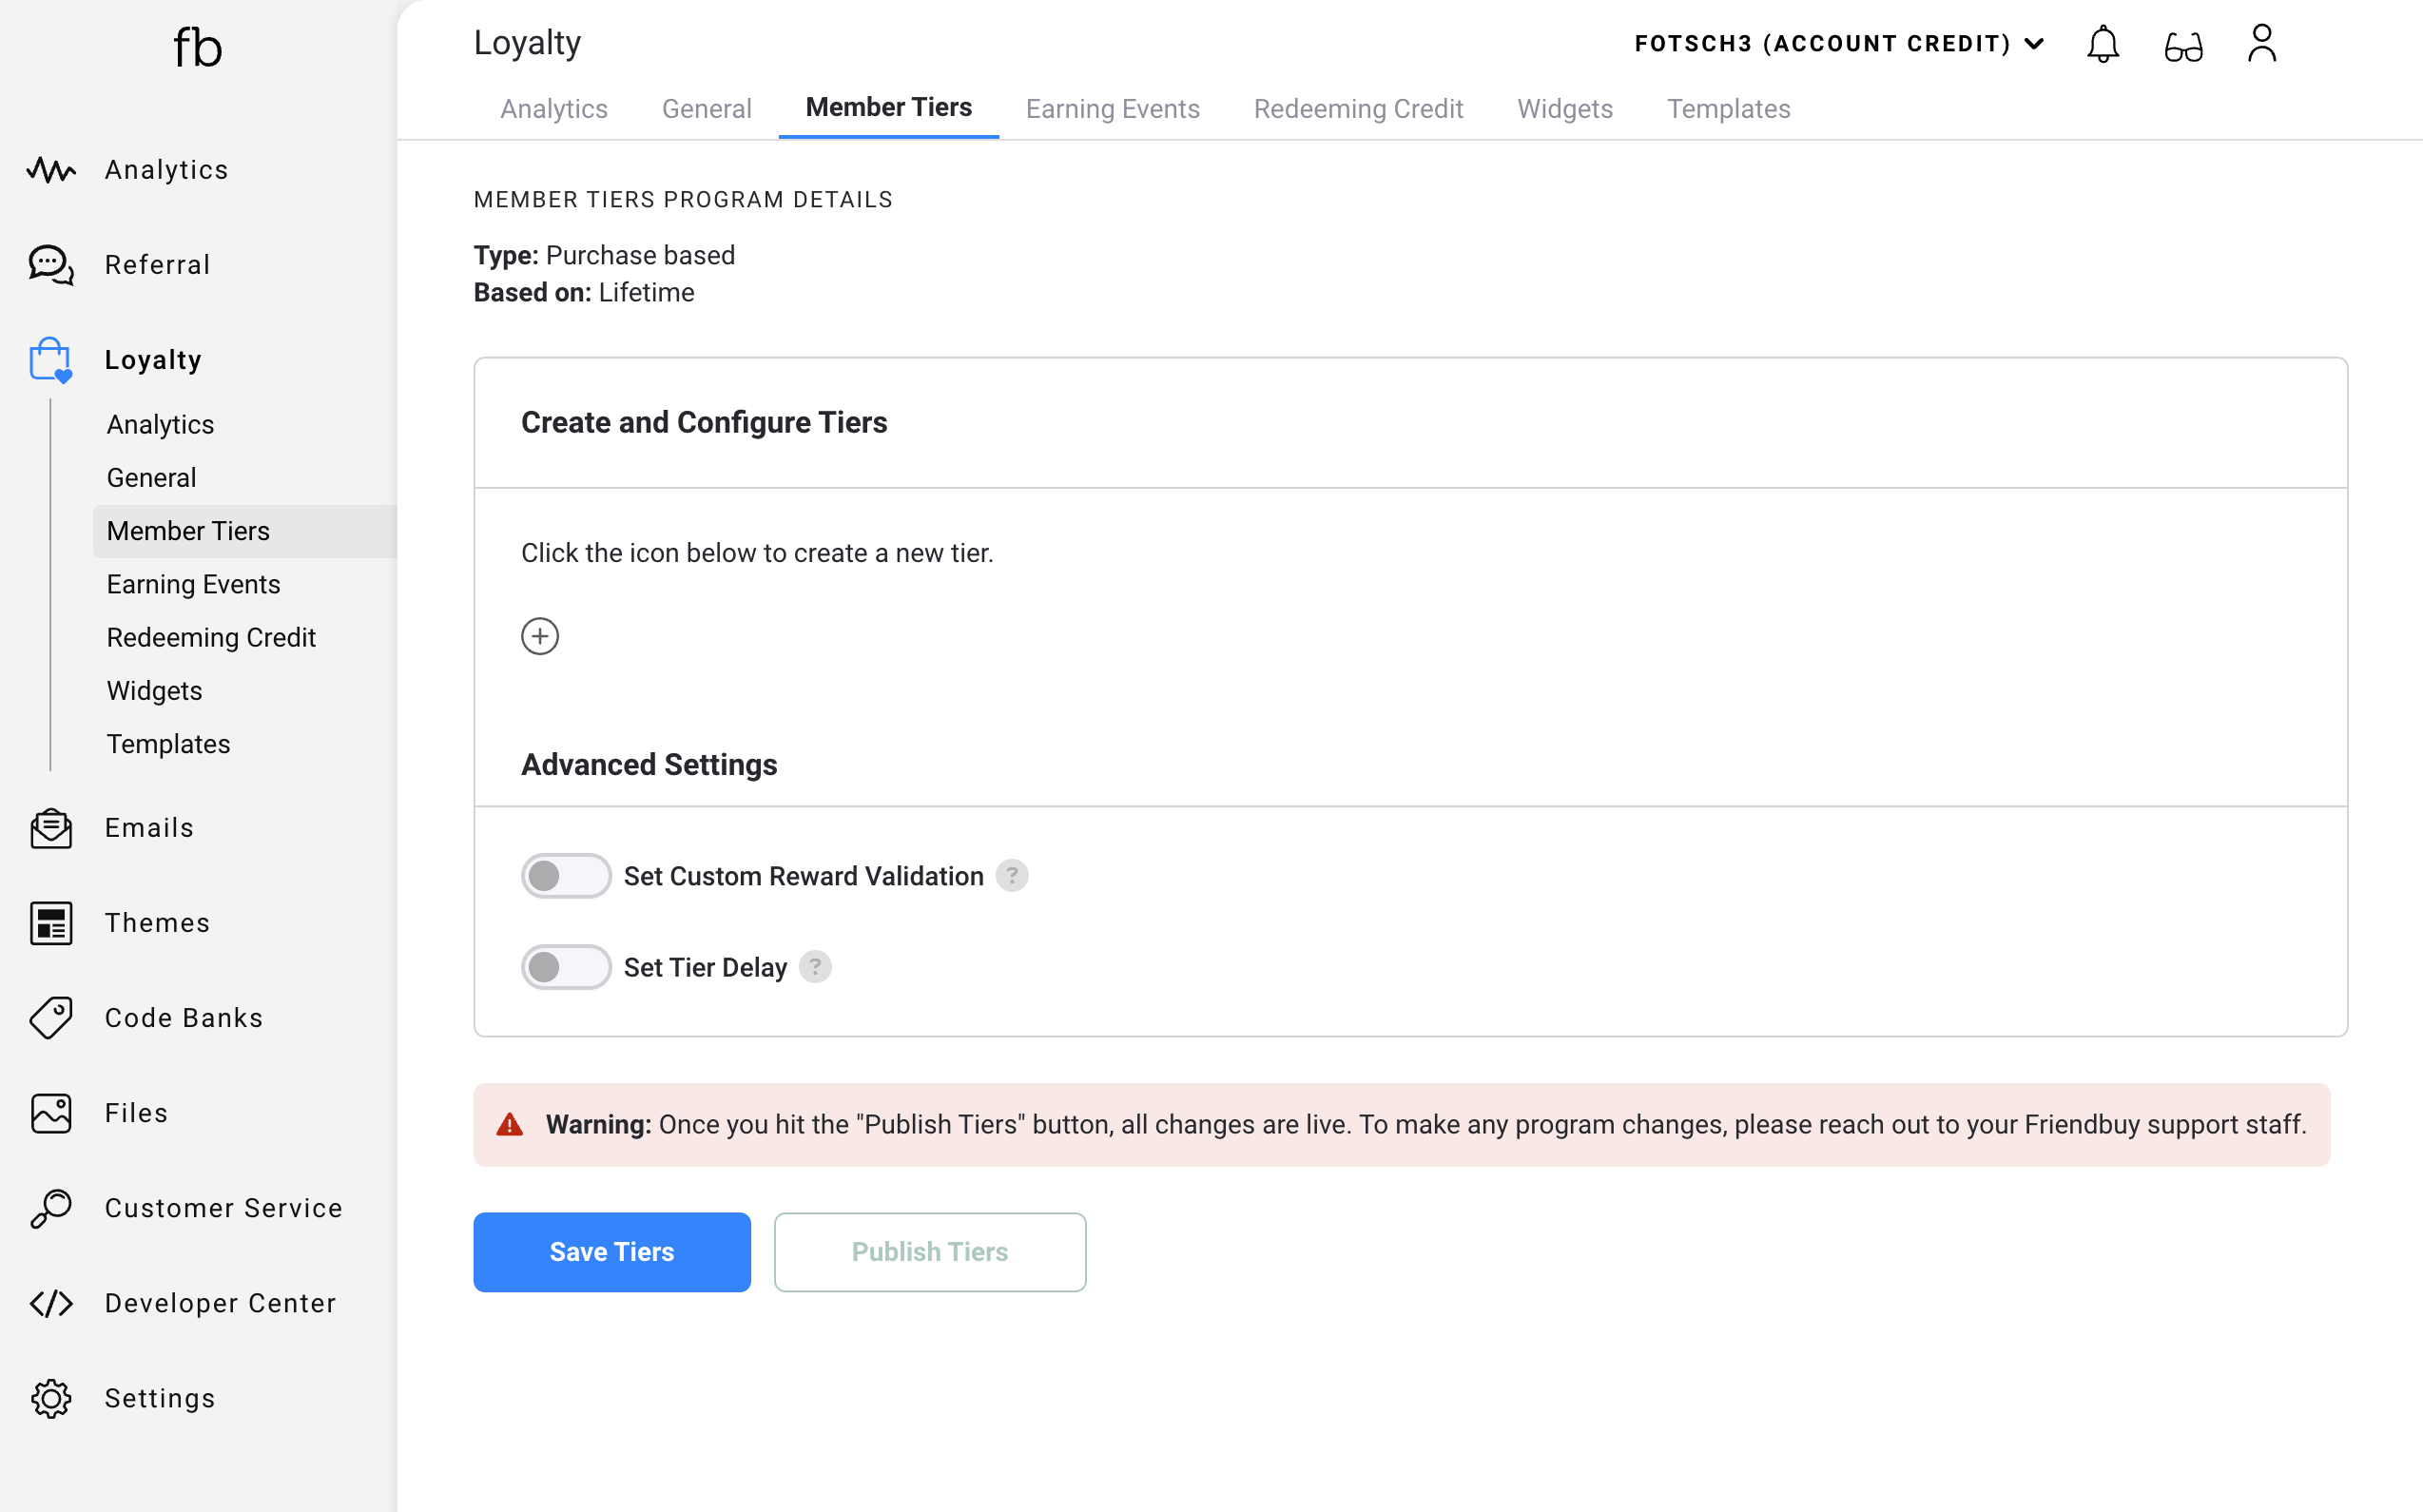
- Create New Tier: Click on the "+" button to add a new tier.
- Define Tier Attributes: In the tier creation modal, you will be asked to define several attributes. These include:
- Tier Name: This should be unique and descriptive, as it will be externally displayed to your customers. For example: Bronze, Silver or Gold
- Minimum Currency Total: This is the minimum spend amount required to enter this tier.
Note: The Maximum Currency Spent value for a given tier (For example: Bronze) will be calculated when you add a new tier (For example: Silver) and specify a Minimum Currency Spent for the new tier (Silver) and click “Save Tiers”.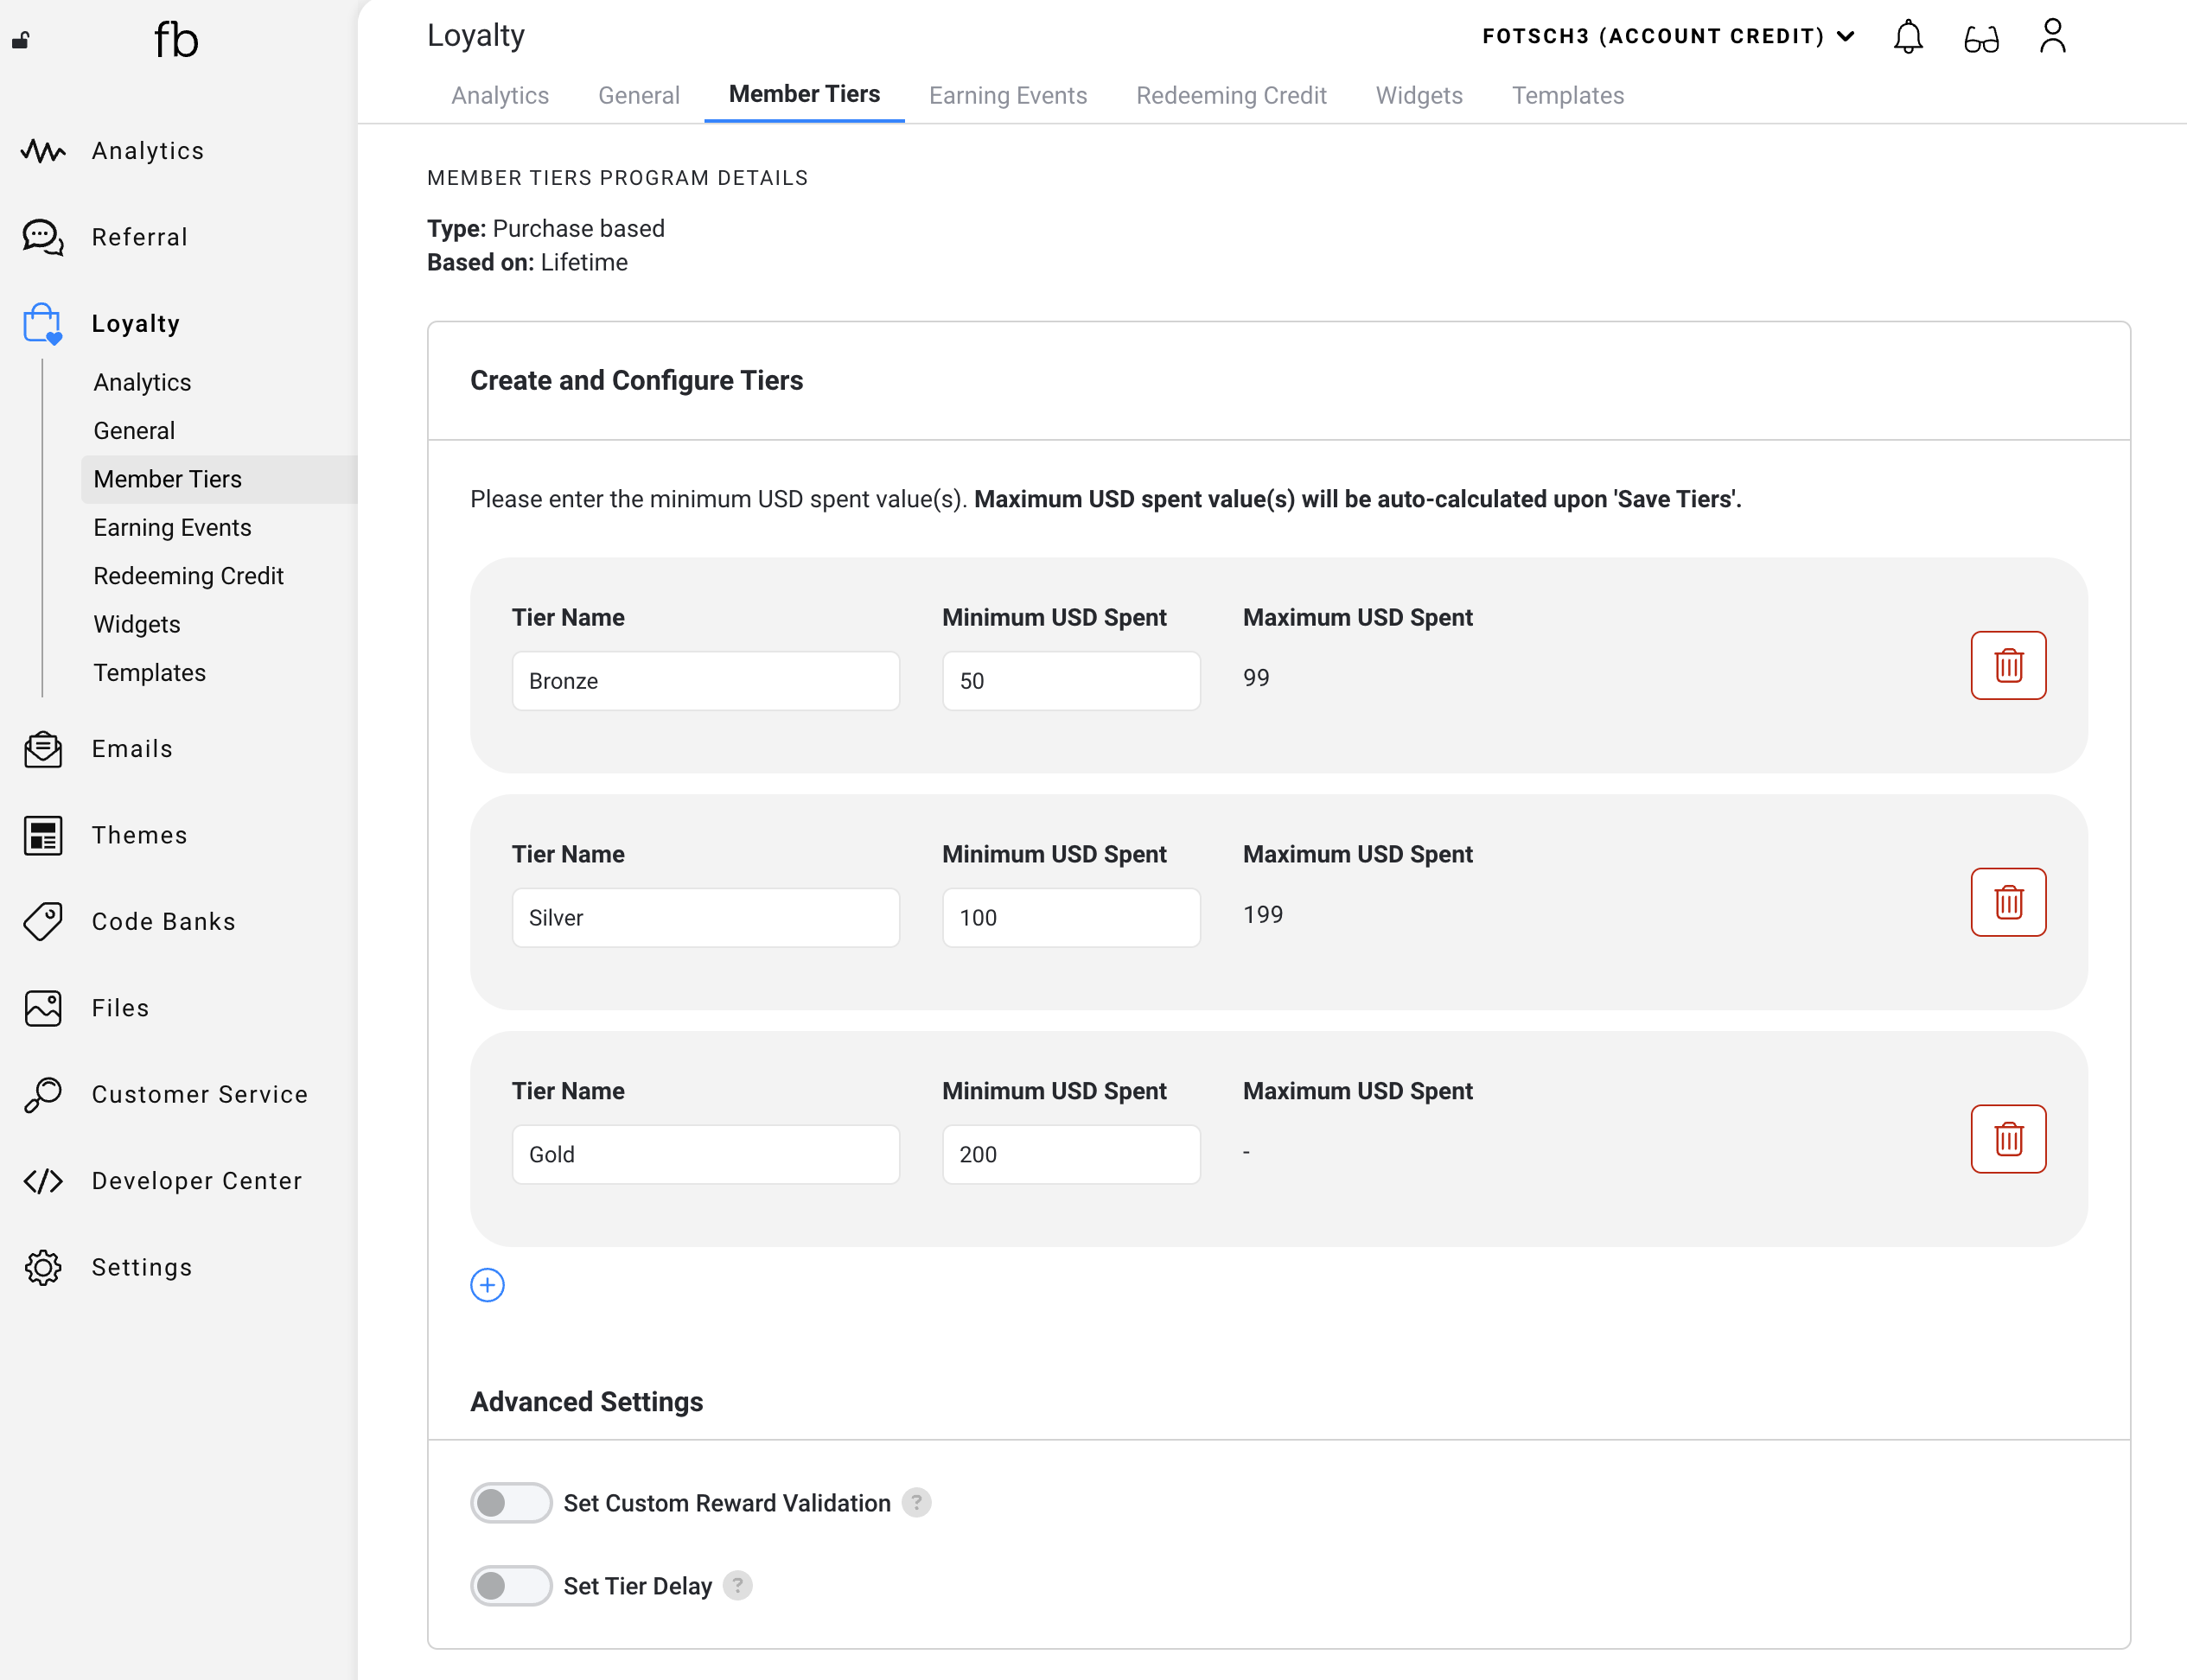
- Repeat Step 3 to add any additional tiers.
- Save Your Tiers: As you make changes, click on "Save Tiers" to save those changes.
Advanced Settings
- If you want Friendbuy to use a custom reward validation to check the validity of a purchase, turn on 'Set Custom Reward Validation' and enter the URL.
- Set a Tier Delay to protect against cancellations or returns before providing any tier upgrades.
- Publish Tiers: Once you are satisfied with the tiers set up, you can publish them to start using them in your Loyalty Program.
Removing a Tier
Prior to publishing tiers, If you need to remove a tier from your program, follow these steps:
- Access the Tier List: Navigate to the "Member Tiers" tab under the "Loyalty" tab.
- Find the Tier: In the list of tiers, locate the one you want to remove.
- Click on the Trash Icon: On the right side of the tier, click on the trashcan icon to initiate the removal process.
- Confirm Removal: A prompt will appear asking you to confirm the removal of the tier. Click "Remove" to proceed.
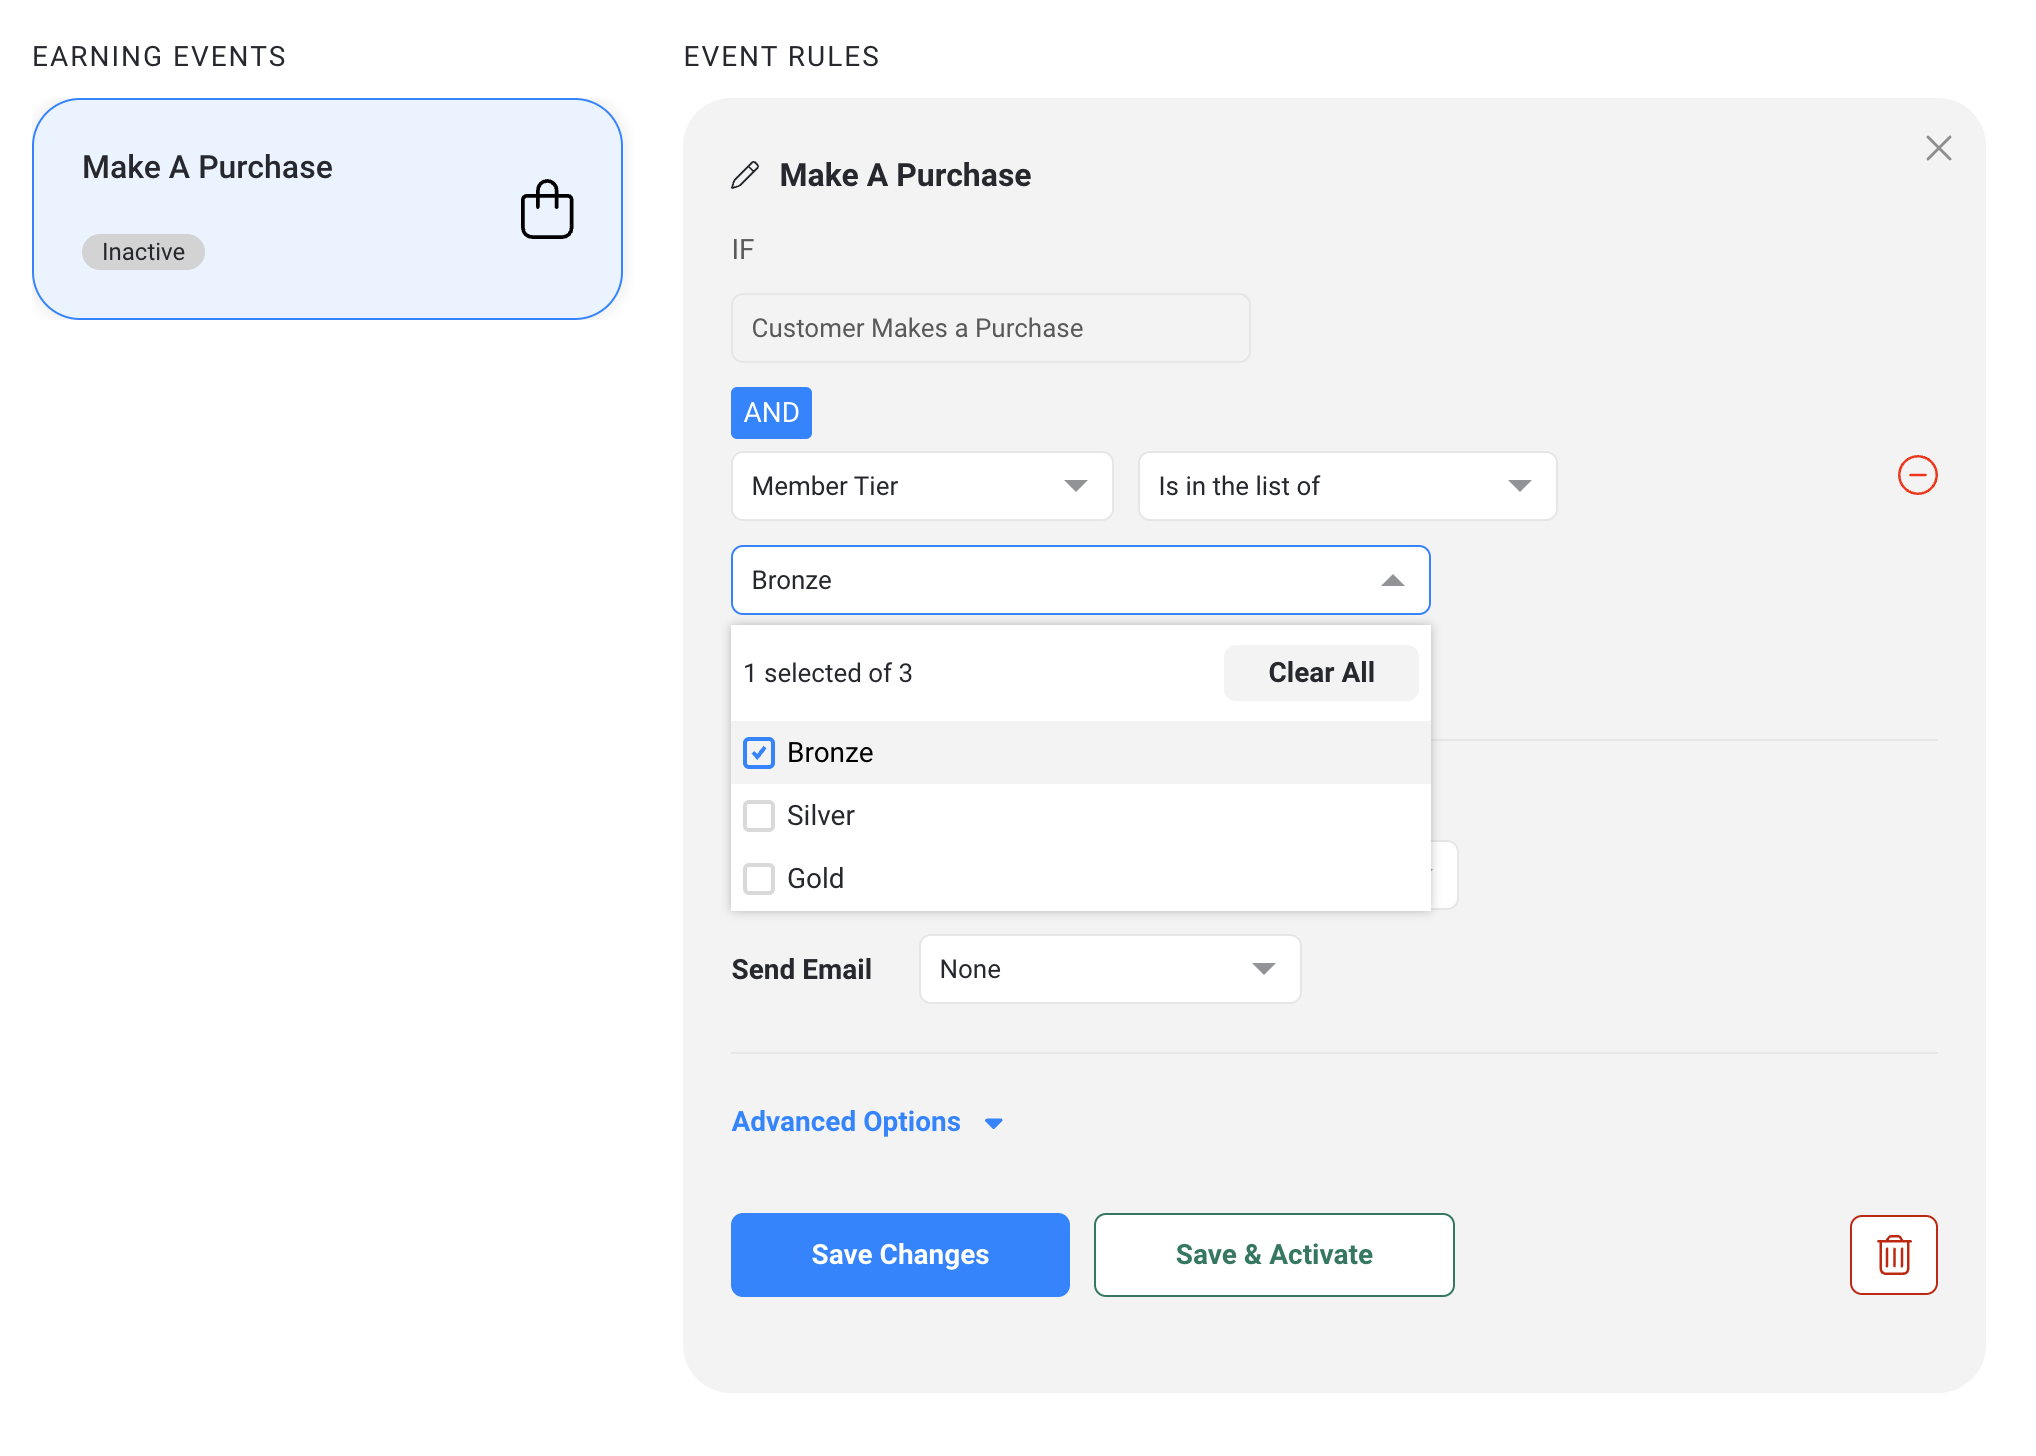
Earning Events & Rewards Setup
Once published, you can start incorporating Member Tiers into Earning Events Rules.
- Navigate to the Earning Events tab in the Loyalty section of your dashboard.
- Click on Add Earning Event and fill in the details of the event.
- Click the + icon under the earning event type. In the dropdown, you can select member tiers as a condition for earning Account Credit.
- Select the tier(s) you want to be applicable to this earning event. The operator will be choosing from a list of all the active tiers set in the member tier tab.
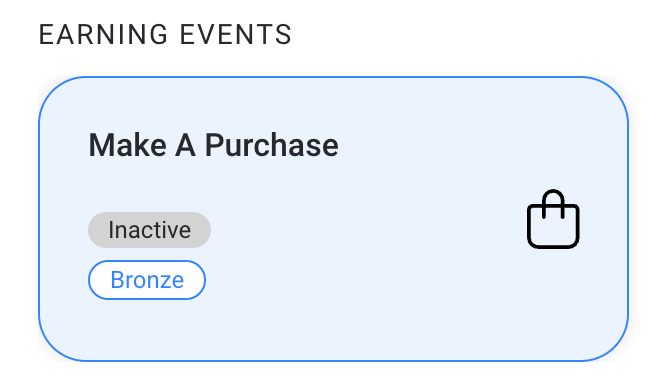
Tagging and Sorting of Earning Events
Once an earning event has a tier condition applied, a new tag will appear on the earning event tile to visually mark any tier(s) applicable. This tag will be directly under the existing Active and Inactive tags in each earning event.
Understanding the Dynamics of Member Tiers
Before incorporating Member Tiers into your loyalty program, it's crucial to understand a few key concepts that define how member tiers work.
Friendbuy provides two ways for determining the Member Tiers status for your customers.
- Total Spent Within Calendar Year: Tier status is determined by the amount spent from January 1st to December 31st of the current year. Every December 31st, the total spent amount for the year will reset to zero.
- Total Spent Within Last 365 Days: Every time a customer makes a purchase or completes an earning event, their tier is being evaluated based on the total amount they have spent in the 365 days prior.
- Lifetime: Tier will be valid forever.
Tier Extension Mechanism
As your customers achieve a new tier, their tier is guaranteed for a set period of time. This is what we call "tier extension."
There are two ways you can configure tier extensions.
- Exactly a year: Tier will last for 365 days from the day the tier is achieved. After this period, tier will be updated based on the total purchased in the current year.
- Until end of the following year: Tier will be valid until the end of the next calendar year. For example, if a customer reaches the Gold tier on November 15, 2022, they will remain in the Gold tier until December 31, 2023. This means that even though their total spent count reset to 0 on December 31, 2022, they get to enjoy the benefits of the Gold tier until the end of the following year. If they spend even more during their tier extension period and qualify for a higher tier (say, Platinum), their tier extension will be re-evaluated. Their guaranteed status period will now apply to the Platinum tier and will be calculated from the day they achieved Platinum tier.
If you make any changes to the Member Tiers Program after a customer joins, their tier status will not be affected immediately. Their tier status is reevaluated when they place a purchase. If you have any questions or concerns about changes to the program, please reach out to our Friendbuy support team for help.