How to Create, Edit, and Manage Loyalty Emails

Loyalty emails are a great way to communicate with your customers after they've completed an Earning Event, redeemed points for coupons or various rewards, or to let them know before their points are about to expire.
Get a unified view of all your Friendbuy emails within the Emails section. It's easy to create new drafts and make edits by managing all your emails in one place. Once an email is ready to be used, assign it to an Earning Event or a Redemption Option in the Loyalty section.
Access your Loyalty Emails
Navigate to the Emails section on the left side menu, and select the Loyalty Emails tab.
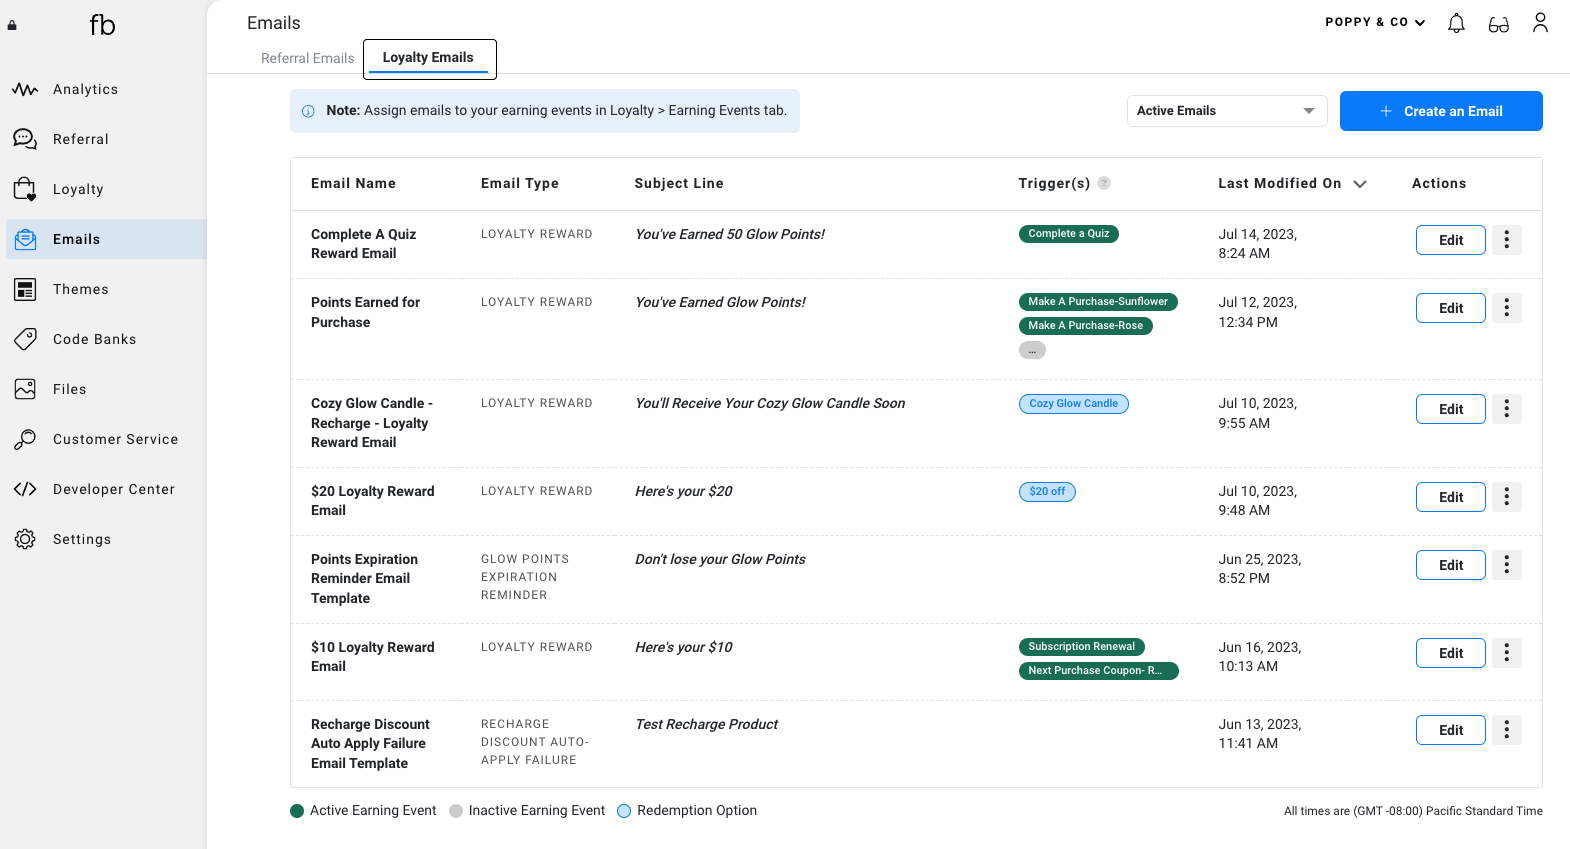
Access all your loyalty program emails in one spot to see which emails are assigned to which triggers. Remember to enter a descriptive and unique Email Name to help keep track of new versions. Each email has a specific Email Type that is chosen when first creating the email. Learn more about each email type and create a new email below.
Trigger(s)
When an email is assigned to a Loyalty Earning Event or Redemption Option, the name will be displayed in the table with either a green tag (indicating the email is assigned to an active earning event), a gray tag (indicating assigned to an inactive earning event) or a light blue tag (indicating assigned to a redemption option). Emails can be assigned to multiple triggers.
Editing
Click the Edit button in the table to open the email editor to make content and design updates. Saved edits will be published live to any associated trigger(s).
Actions
Click the three dots menu under the Actions column to see an email Preview, Send Test Email to your inbox, Duplicate an email to make a copy, or Archive / Unarchive an email to hide / show it in the table.
Sorting
Use the Last Modified On column to check the date and time the email was last edited. By default, emails will be sorted with the most recently modified at the top of the table.
Creating an Email
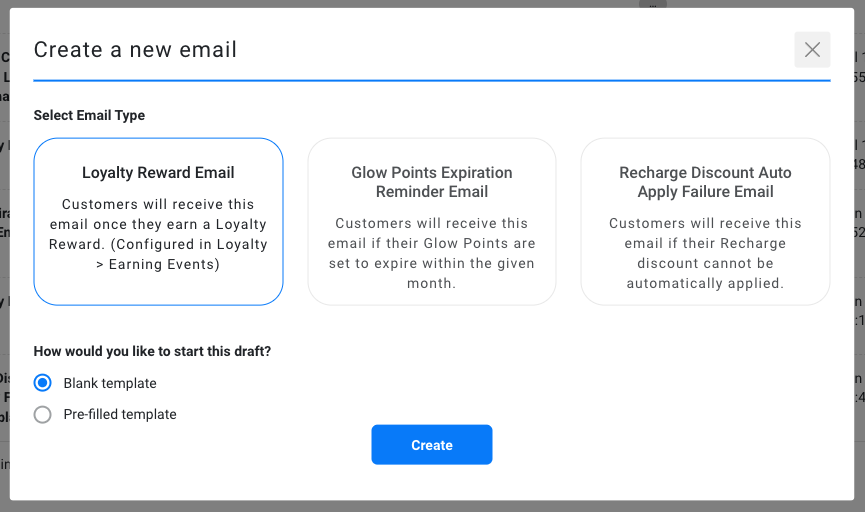
- Click on the Create an Email button
- Select an Email Type you plan to use in your Loyalty Program. Note: Email Type cannot be changed after an email is created.
- Select the Pre-filled template option if you wish to get started with an existing HTML template.
- Enter an Email Name, Subject Line, Text Body, and HTML Body in the email editor. Note: Email Name must be unique. Click Show Merge Variables to see the list available for the Email Type you selected. You can include merge variables in any of the email fields to customize your messaging, which will then update with the corresponding value when it is sent to a customer.
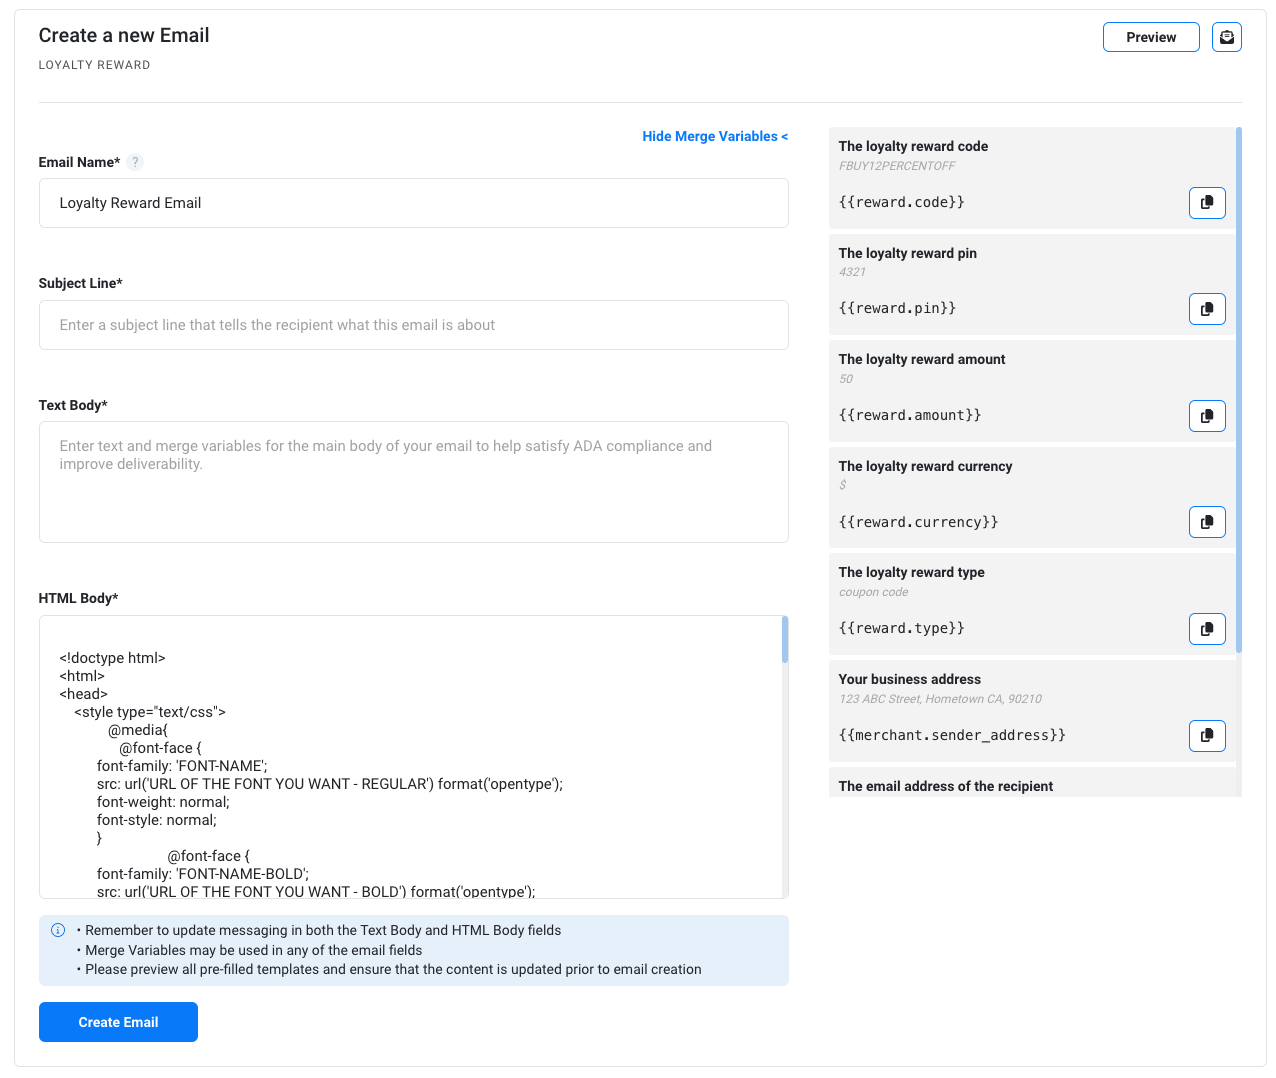
- Optionally, you can Preview or Send Test Email to yourself within the email editor (located on the top right corner). You will also have the option to do this after the email is created.
- Click Create Email to add it to the Emails table. Note: Newly created emails will start off as a draft and will not be assigned to a campaign.
Editing an Email
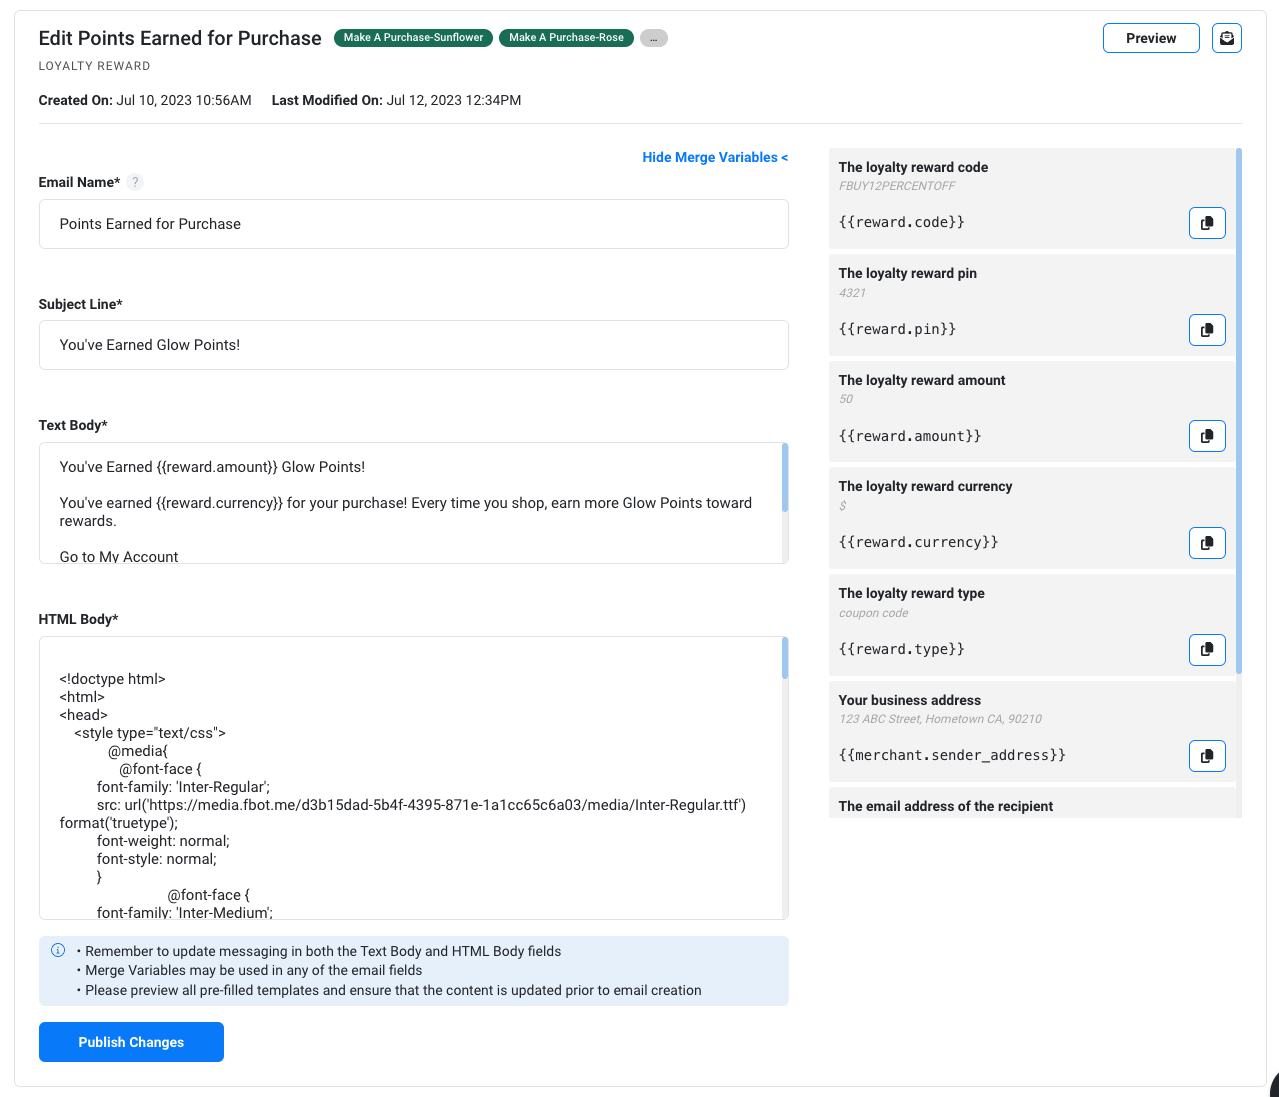
All email editing must be done from within the Emails section - not within the Loyalty section.
In the Emails table > click Edit to open the email editor. At the top, you can see a Trigger tag(s) if the email is currently assigned to any Campaign(s). You can also see the Created On date and Last Modified date for each email.
Editing an email assigned to a trigger will publish the changes live to the campaign immediately.
When using Merge Variables, be sure to copy and paste the variable exactly as it is shown in the list. Variables are different depending on the Email Type so be cautious not to use a variable which is not listed.
Duplicate an Email
In the Emails table > click the three dot menu > select Duplicate

Duplicated emails will open in the email editor with a copy of the same Email Type, Email Name, Subject Line, Text Body, and HTML Body from the original email. Remember to rename the newly duplicated email to keep organized!
The duplicate email will start off as a draft and will not be assigned to a trigger.
Preview an Email
In the Emails table > click the three dot menu > select Preview
Email previews will display the HTML as it will appear on Desktop view in a customer's email client, including the From Name, From Email, and Subject Line.
The From Name will be the Company Name set up in the Account > Email Sender settings. Learn more about Email Sender settings here.
Send a Test Email
In the Emails table > click the three dot menu > select Send Test Email to trigger an email to your account's inbox.
Note: Merge variables will not be populated in the test email.
Archive or Unarchive an Email
In the Emails table > click the three dot menu > select Archive or Unarchive
Archived emails will only be visible in the table when using the filtering option above the Emails table. Archived emails will appear with their name grayed out and cannot be edited or duplicated. You can still preview or send a test email using the three dot menu.
Note: If you archive an email that is associated to a Draft Earning event, it will not Archive the Earning Event itself and vice versa. Emails that are assigned to an Active Trigger cannot be Archived.
Assign an Email to an Earning Event
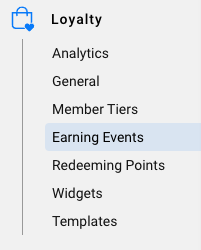
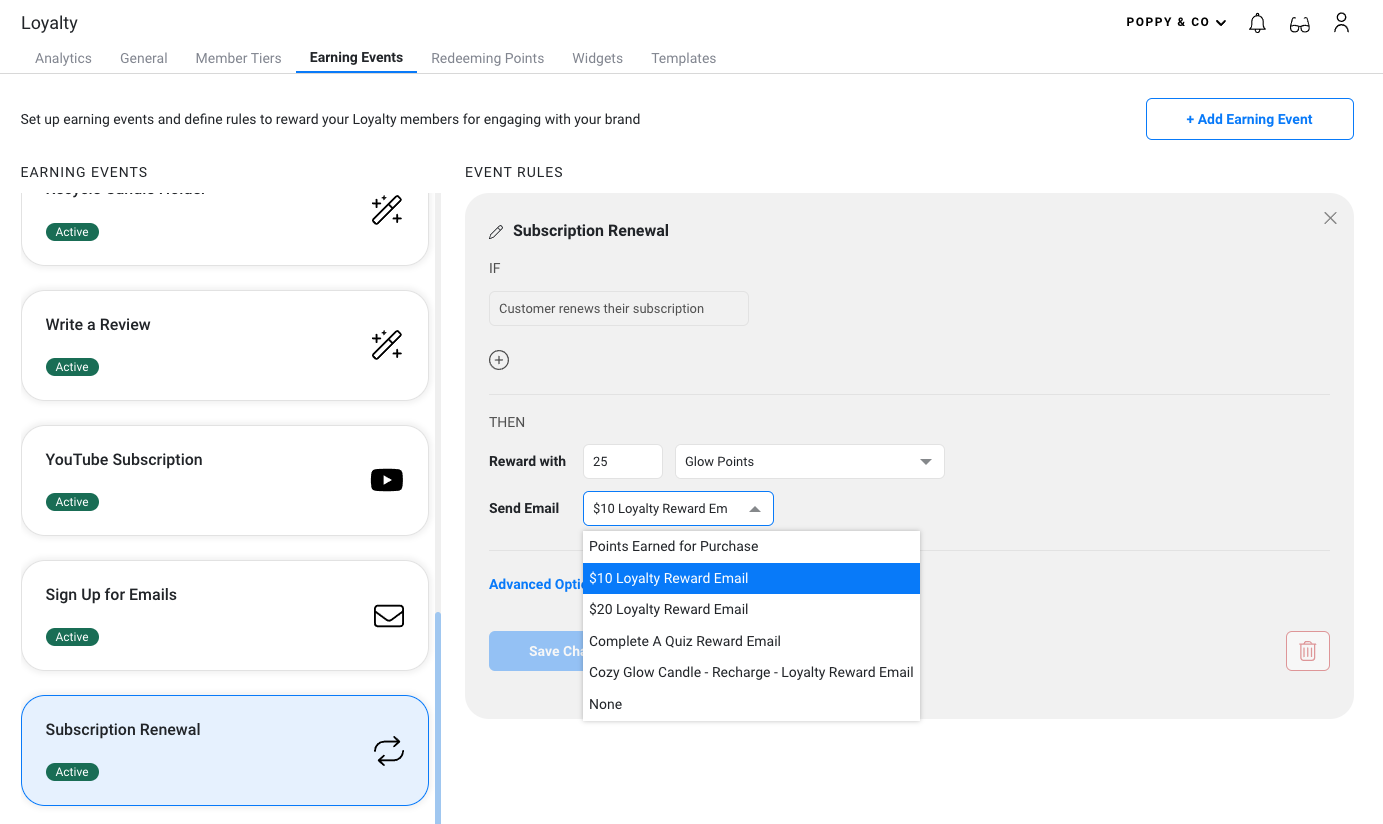
To assign an email to an Earning Event, go to Loyalty > Earning Events
Select the desired earning event or create a new one, and under the THEN options, click on the Send Email dropdown to select the email you wish to send to the customer once this earning event is completed.
Note: Archived emails will not be selectable.
You can also replace or remove an existing emails that is already assigned to the event.
Assign an Email to a Redemption Option
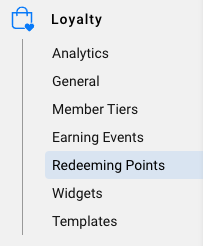
To assign an email to a Redemption Option, go to Loyalty > Redeeming Points
Select the desired redemption option or create a new one, and under the THEN options, click on the Send Email dropdown to select the email you wish to send to the customer once they redeem points towards a coupon code, gift card or any custom reward.
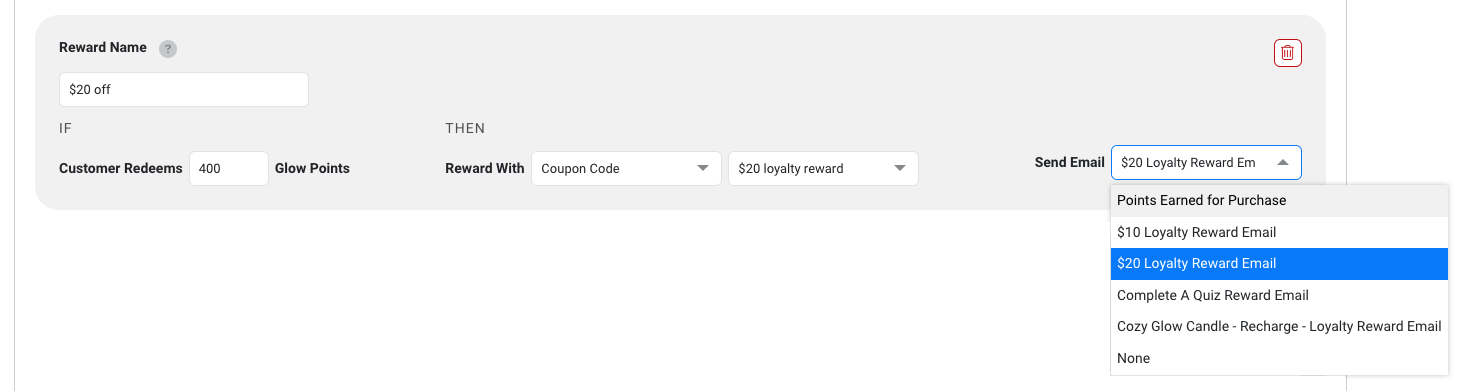
Note: Archived emails will not be selectable.
You can also replace or remove an existing emails that is already assigned to the trigger.